Why Knowing ARC Raiders’ Enemies Matters?
Most players focus on guns and loot early on. That’s a mistake.
How does enemy knowledge improve survival and looting success?
Once you understand where the critical damage zones are, your time-to-kill drops by roughly 30–50% in real encounters. Less noise, less ammo spent. Fewer third-party players are showing up.
Why do players search for hornet, baron, husk, leaper, and harvester?
These enemies aren’t just common. They’re build-defining threats. Each one forces you to adapt positioning, weapon choice, and timing.
What does this guide cover?
You’ll get a breakdown of every major enemy type, including tactics, weak spots, and real combat decisions that actually work. Not theory. What works under pressure.
What Are Enemies in ARC Raiders?
You’re not fighting random mobs, you’re dealing with a coordinated machine ecosystem.
Understanding the ARC machine threat
Enemies are autonomous war machines with layered armor plating, sensor tracking, and mobility systems like thrusters and jump modules.
How does enemy AI work in combat encounters?
AI reacts to sound, line of sight, and damage direction. Hit a weak spot, and they reposition aggressively. Miss it, and they soak damage like a tank.
PvE danger vs PvPvE pressure
Here’s what most guides miss: players are often more dangerous than the machines. Every loud fight increases your risk.
Why do different enemy classes require different strategies
A Leaper punishes hesitation. A Husk punishes bad ammo. A Bombardier punishes poor positioning. Treat them differently or lose.
Best ARC Raiders Enemies List
Here’s a quick overview before we go deep:
| Enemy Type | Threat Level | Key Weak Spots | Best Counter |
| Hornet | Medium | Rear engines | Medium ammo rifles |
| Hornet Driver | Medium | Driver module | Precision shots |
| Hornet Baron | High | Core + thrusters | Team focus fire |
| Husk | High | Underbelly | Armor-piercing |
| Leaper | High | Leg joints | Shotguns, mobility |
| Harvester | Medium | Side panels | Ambush tactics |
| Bombardier | Very High | Rear housing | Long-range rifles |
| Osprey | Medium | Engines | Anti-air weapons |
| Bees | Low | Swarm core | AoE damage |
| Jupiter | Unknown | Unknown | Avoid or prepare |
Wasp ARC Raiders
The Wasp is a fast, lightweight ARC drone designed for aggressive aerial combat. It usually appears in groups, patrolling open areas and acting as an early warning system for enemy activity. You’ll often see them paired with stronger units like Hornets, making encounters more intense for unprepared players.
Attack pattern and behavior
Once a Wasp detects you, it switches instantly into combat mode. A red targeting laser locks onto your position before it fires a burst of rapid light ammo. The drone briefly hovers to stabilize its aim, but don’t get comfortable—it quickly shifts position, making it harder to track. When damaged, its movement becomes unpredictable, which can confuse even experienced players.
Weak points and how to destroy them?
The biggest weakness of a Wasp is its exposed thrusters. These are not armored, so focusing your shots here is the fastest way to take them down. Destroying multiple thrusters destabilizes the drone, causing it to lose control and crash. Each crash deals massive damage, often destroying it completely.
However, there’s a catch. Once the thrusters are damaged, the Wasp starts flying erratically. This makes it harder to aim, so timing and accuracy are key.
The best strategy to survive wasp swarms
Facing multiple Wasps at once can get overwhelming. The smartest move is to avoid standing in the open. Use cover and keep moving, and a Lure Grenade can distract the swarm, giving you a few seconds to escape or reposition.
Loot and rewards you shouldn’t miss
Destroyed Wasps are easy to ignore, but that’s a mistake. They often drop valuable resources like Light Ammo, ARC Alloy, and crafting materials. The rare Wasp Driver is especially important, as it’s used for upgrading your Gunsmith and unlocking better gear.
If you’re farming resources, targeting Wasp patrols can be a quick and efficient strategy, just make sure you’re ready for backup enemies being called in.
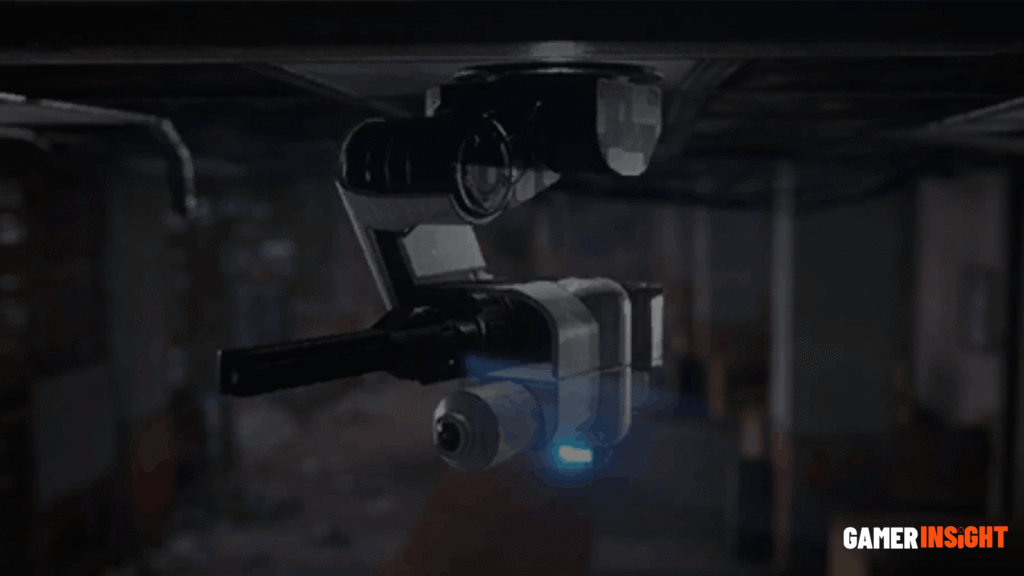
Snitch ARC Raiders

The Snitch is a small scouting drone in ARC Raiders that focuses on detection, not combat. It does not attack directly, but it’s still dangerous. Why? Because once it finds you, it calls in stronger enemies from orbit. Think of it as the “alarm system” of ARC forces, constantly scanning areas where Raiders are active.
How does the Snitch detect you?
The Snitch uses a wide scanning beam that looks like a moving spotlight. If that beam touches you, it begins tracking your position. After detection, it starts a sequence of alert signals. If it completes enough calls, reinforcements like Wasps or Hornets will arrive quickly.
To stay safe, avoid open areas and use natural cover. Hiding in bushes or dense foliage can sometimes prevent the scanner from locking onto you.
Weak points and how to destroy them?
Like many ARC drones, the Snitch relies on exposed thrusters to stay airborne. These are its main weaknesses. Shoot the thrusters to destabilize it and force a crash. A few accurate shots using Medium or Heavy Ammo weapons can destroy it before it sends out a full alert.
Be careful, though, once its thrusters are damaged, its movement becomes shaky and unpredictable, making it harder to hit.
Best strategy to prevent reinforcements
Your top priority should always be to eliminate the Snitch quickly. The longer it survives, the higher the risk of more enemies joining the fight. If you act fast, you can stop reinforcements before they even arrive.
Some advanced players intentionally let it call backup to farm loot, but that strategy can backfire if you’re not fully prepared.
Loot and valuable rewards
Destroying a Snitch gives useful crafting materials like ARC Alloy, Synthetic Resin, and Sensors. The rare Snitch Scanner is especially valuable, as it upgrades your Utility Station and can even be used creatively to trigger enemy drops in specific areas.
If you want better control over fights and farming routes, learning how to handle Snitches is essential.
Rocketeer ARC Raiders
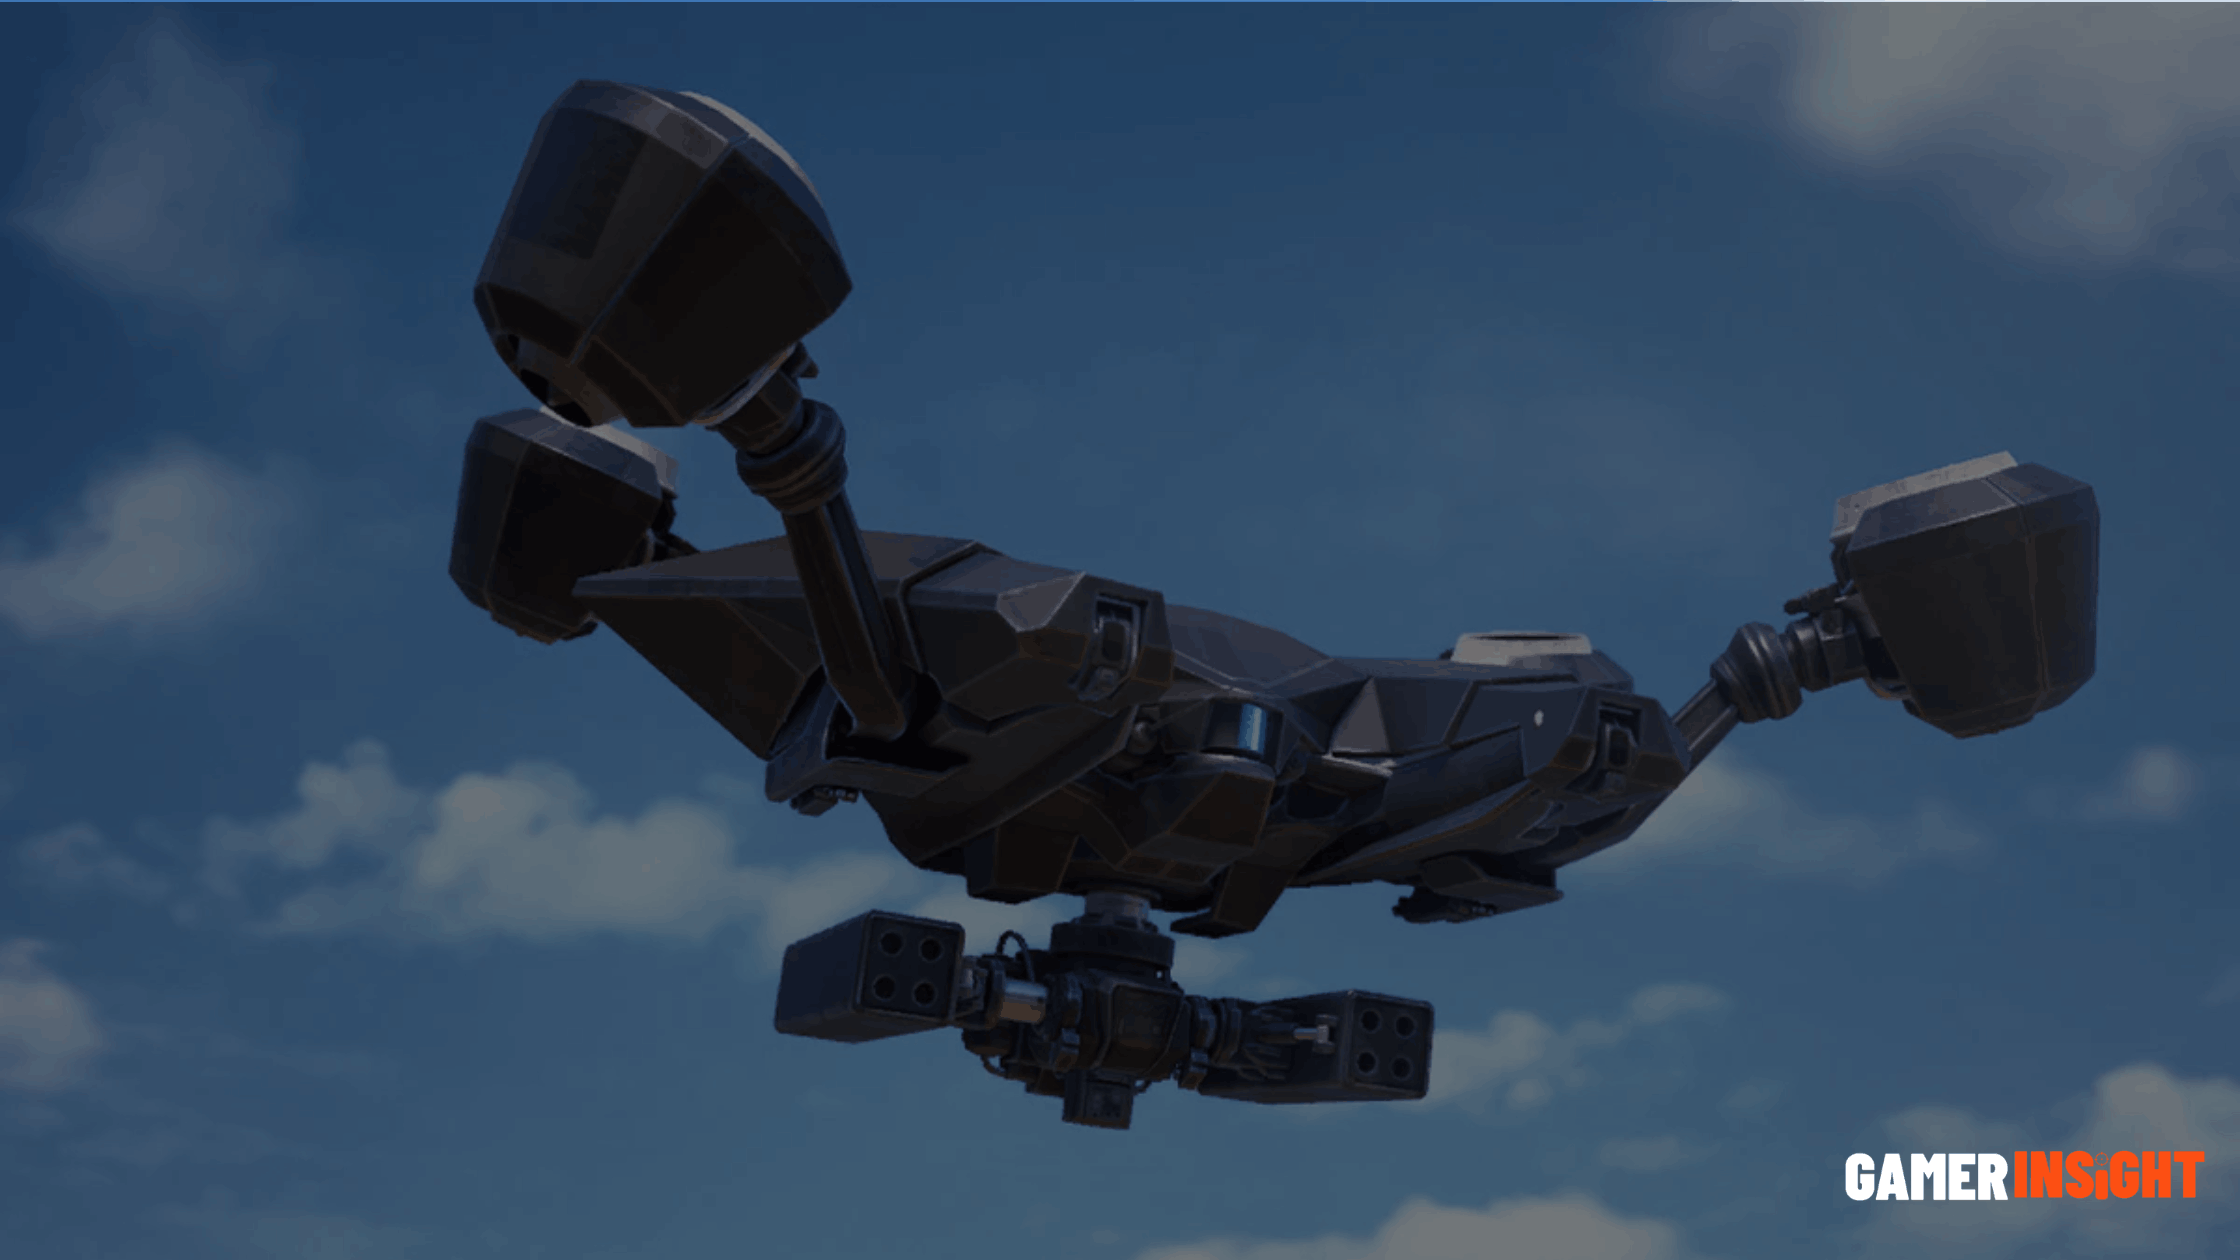
The Rocketeer is one of the most dangerous flying enemies in ARC Raiders. This heavy aerial machine is built for long-range destruction and is usually found guarding high-value targets. If you’re caught in the open, it can take you down in seconds, making it a top-tier threat for every Raider.
Attack pattern and lock-on system
The Rocketeer uses four laser beams to target you. These lasers turn from yellow to red just before it fires missiles. Once locked, it can launch up to four rockets, each dealing massive damage. Two direct hits are often enough to eliminate you.
When you see the red laser disappear, that means the lock is completely moved immediately. Use a dodge roll or get behind strong cover. Keep in mind that rockets cause splash damage, so hiding too close to the impact area can still hurt you.
Weak points and the best way to destroy them?
The key to beating the Rocketeer lies in its thrusters and upper weak points. Its thrusters are not armored, but they are tough and require focused fire. Destroying at least two will force it to crash. If it falls from a high altitude, it can destroy itself on impact.
Another effective tactic is to break its front “eyebrow” armor using weapons with high armor penetration. This exposes a critical weak spot on top, where rapid-fire weapons or explosives can deal heavy damage.
Smart combat strategies
Never fight a Rocketeer in the open. Always use buildings or solid structures as cover. Grenades like Snap Blast are extremely effective when thrown on top of it. A Showstopper grenade can temporarily bring it down, giving you a chance to climb on and deal direct damage.
You can even ride the Rocketeer using tools like a snap hook or by climbing when it’s stunned. While on top, you can shoot, melee, or place explosives—but be careful, it will try to shake you off.
Advanced tips and loot rewards
You can use a Lure Grenade creatively by sticking it to another enemy. This causes the Rocketeer to attack that target instead of you. It’s a clever way to deal extra damage without risk.
Once destroyed, the Rocketeer drops high-value loot, including Heavy Ammo, ARC Alloy, Advanced Powercells, and the rare Rocketeer Driver. This item is essential for upgrading your Explosives Station and progressing faster.
Mastering the Rocketeer fight is all about timing, positioning, and precision. If you stay patient and use the right strategy, even this flying powerhouse can be taken down.
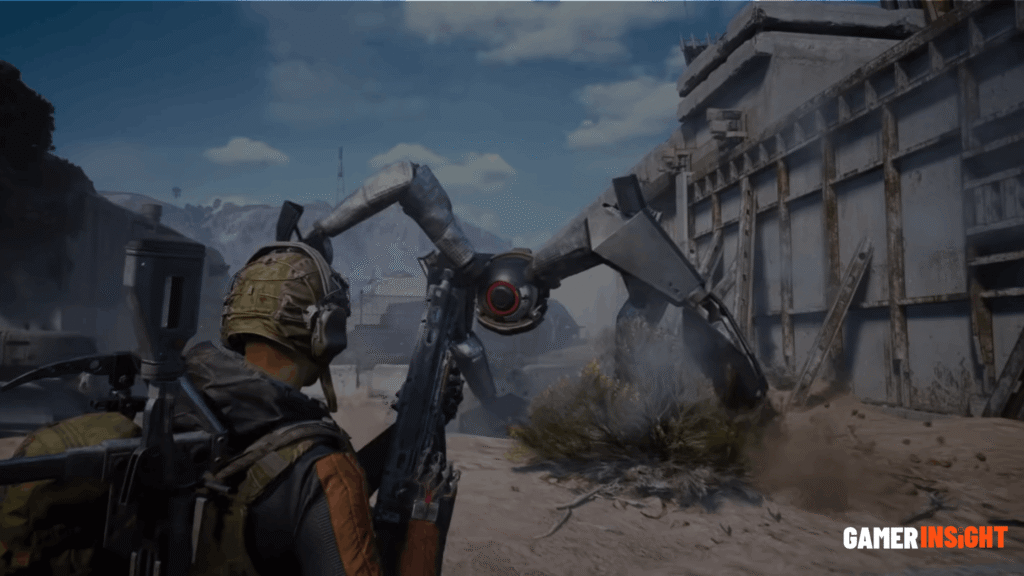
Tick ARC Raiders
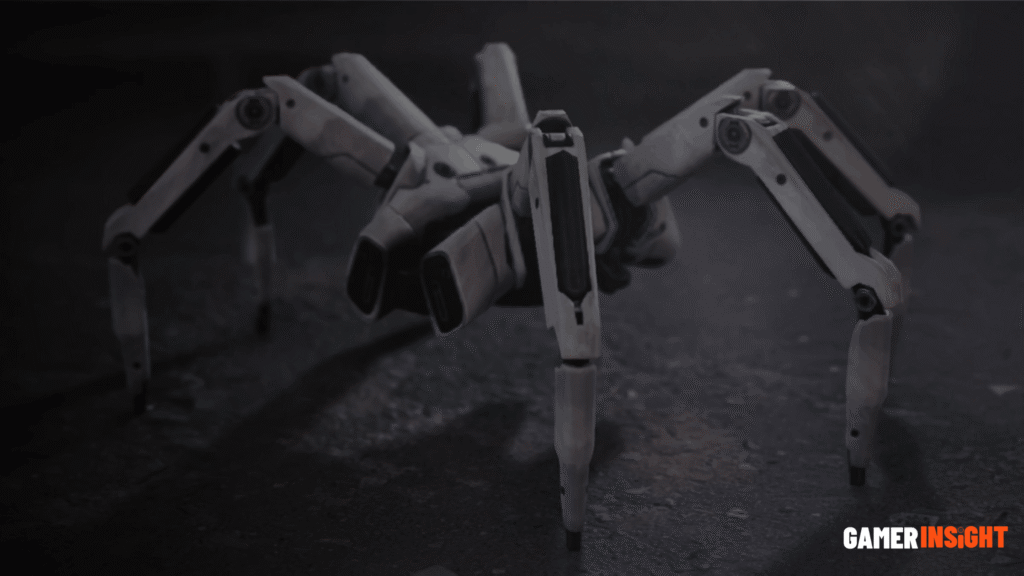
The Tick is a small, spider-like ARC machine that focuses on close-range attacks. Unlike larger enemies, it doesn’t rely on heavy weapons. Instead, it jumps directly onto you and drains your health and shields. You’ll mostly find Ticks inside buildings, hiding on ceilings, walls, or rafters, waiting for the perfect moment to strike.
Attack behavior and warning signs
Ticks are easy to miss but easy to hear. Before attacking, they make a clear mechanical shuffling sound. This is your warning. Once active, the Tick will leap toward your head and attach itself to you.
While attached, it slowly drains your health and shield. To remove it, you need to press and hold the interact button quickly. If you delay, your health can drop faster than expected, especially if multiple Ticks attack at once.
After being removed, the Tick doesn’t just disappear. It drops to the ground, runs away briefly, and may jump again for another attack.
Weakness and an easy kill method
The good news? Ticks are very fragile. You don’t need to waste bullets on them. A single hit with a melee tool is enough to destroy one instantly. This makes melee the best and most efficient way to deal with them, especially when conserving ammo.
However, things get tricky in groups. One Tick is simple. A swarm can overwhelm you quickly if you panic or fail to react fast.
Best strategy to survive tick attacks
Always stay alert when entering indoor areas. Look up at ceilings and listen carefully for movement. If you hear their sound, prepare for an attack.
Keep your distance when possible and clear rooms slowly. If multiple Ticks jump on you, focus on removing them one by one and repositioning to avoid getting surrounded.
Loot and useful rewards
Ticks may be small, but they drop useful materials like ARC Alloy, Flex Rubber, and Thermo Lining. The most important item is the Tick Pod, which is used to upgrade your Medical Lab.
If you want easy crafting materials early in the game, farming Ticks indoors can be a simple and effective method—just don’t underestimate them in numbers.
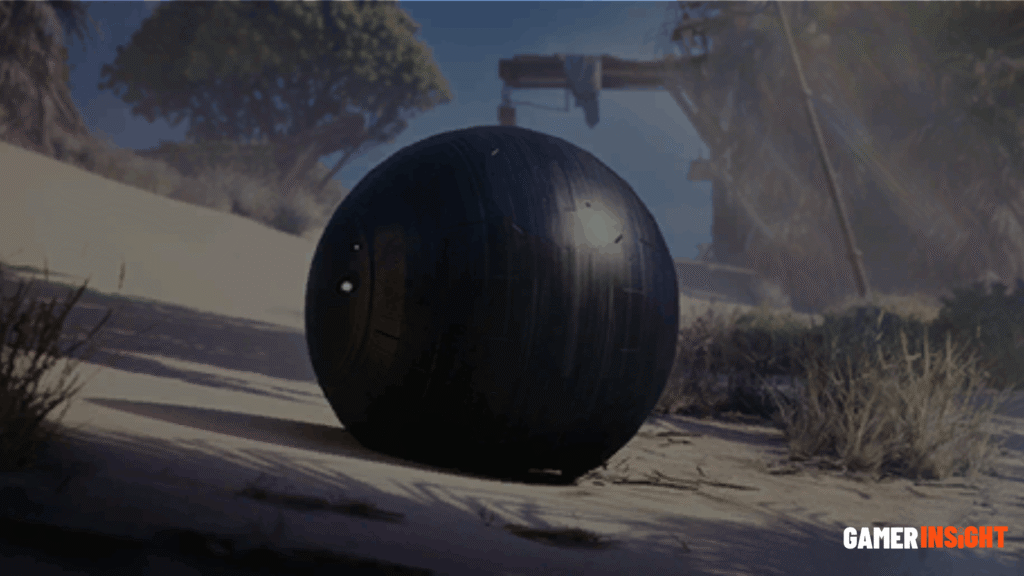
Pop ARC Raiders
The Pop is a small, round ARC machine built to explode on contact. It acts like a moving bomb, designed to block areas and stop the Raiders from pushing forward. You’ll usually encounter Pops inside buildings, often alongside other enemies like Fireball units, making tight spaces even more dangerous.
Attack pattern and warning signs
The Pop doesn’t shoot, it charges. Once it detects you, it rolls quickly in your direction while making a loud beeping sound. This sound is your only warning. As it gets closer, the beeping becomes faster, signaling that detonation is near.
After a short delay, it explodes, dealing heavy damage to both your health and shield. If you’re too close, it can easily take you down in a single blast, especially in confined areas.
Weaknesses and how to destroy them?
The Pop has no armor, which makes it easy to destroy if you react quickly. The best option is to use a fast-firing weapon and shoot it before it reaches you. Timing matters here; wait too long, and you’ll be caught in the explosion.
It usually struggles with obstacles like stairs or high surfaces, but don’t rely on that. Sometimes it finds unexpected paths, catching players off guard.
Best strategy to avoid damage
The safest way to deal with Pops is to keep your distance. As soon as you hear the beeping, move back and create space. Always stay aware of your surroundings, especially indoors, where escape routes are limited.
If multiple Pops appear, don’t panic. Focus on the closest one first and keep repositioning. Staying calm and reacting quickly is the key to survival.
Loot and rewards worth farming
Even though Pops are dangerous, they drop useful crafting materials. You can collect ARC Alloy, Coolant, and Crude Explosives. The most valuable drop is the Pop Trigger, which is used to upgrade your Explosives Station.
Farming Pops can be rewarding, especially for players looking to upgrade explosive gear early. Just remember one wrong move, and this small enemy can deal massive damage.
Fireball Arc Raiders

The Fireball is a fast, rolling ARC machine built for close combat. You’ll mostly encounter it inside bunkers, underground areas, and tight indoor spaces. It often appears alongside Pop units, making these extremely dangerous for unprepared Raiders.
Attack pattern and fire damage
The Fireball’s main weapon is a powerful flamethrower. When it spots you, it rolls closer and opens its front panel to release a stream of fire. If you get caught in the flames, you’ll take heavy damage instantly. Even worse, you’ll continue burning for a few seconds after the attack, slowly losing health.
Another thing to watch for when a Fireball is destroyed is that it can leave behind burning ground. Stepping into it will set you on fire again, so don’t rush forward too quickly.
Weaknesses and how to destroy them?
The Fireball has two states: closed and open. When closed, its outer shell is strong and can resist Light Ammo. You’ll need Medium or Heavy Ammo weapons to break through it.
However, the best time to attack is when it opens its front panel to fire. This exposes its weak core, which can be destroyed quickly with almost any weapon. Timing your shots here will save ammo and end the fight faster.
Best strategy to survive fireball attacks
Distance is your best defense. Don’t let it get close. As soon as you see it rolling toward you, move back and prepare to shoot.
You can also:
- Dodge roll to avoid the flame burst
- Use (higher ground) where it can’t be reached easily
- Attack before it gets into range
Stay calm and don’t panic. Damage happens when players freeze or run in the wrong direction.
Loot and rewards
Fireballs drop useful crafting materials like ARC Alloy, Coolant, and Crude Explosives. The rare Fireball Burner is especially valuable, as it helps upgrade your Refiner and unlock better crafting options.
If you’re farming materials in indoor zones, Fireballs are worth targeting, but only if you control the fight.
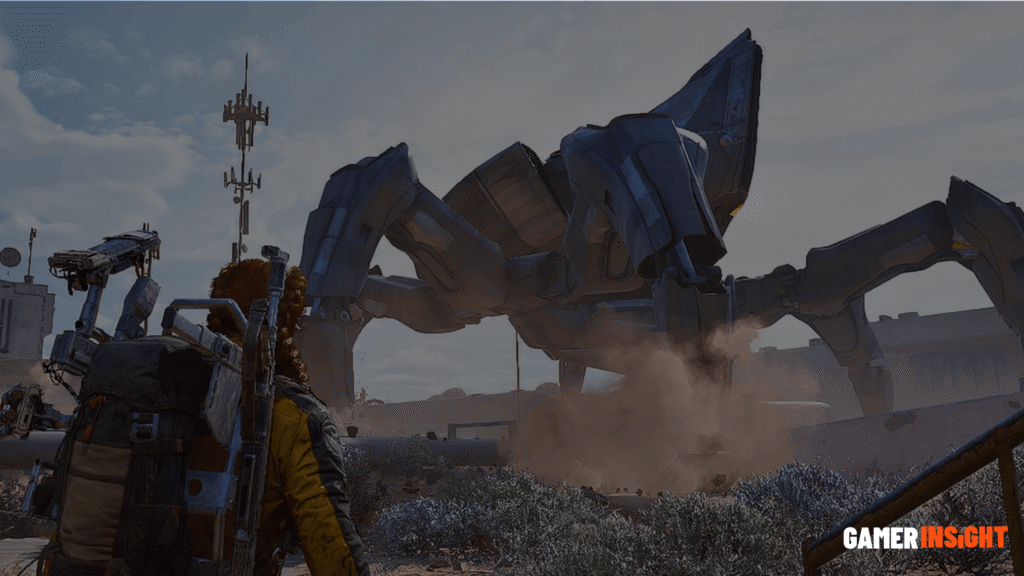
Queen ARC Raiders

The Queen is one of the biggest and most dangerous enemies in ARC Raiders. This massive six-legged machine usually appears near Harvesters when special map conditions are active. Its role is simple: to protect valuable resources at all costs. If you engage the Queen without a plan, the fight can end very quickly.
Attack patterns you must understand
The Queen controls the battlefield with multiple deadly attacks. It launches several mortar shots from above, which land around you and explode after a short delay. These blasts create burning zones that deal heavy damage.
It also uses a powerful laser beam that tracks players in its line of sight. This beam scorches the ground and forces you to keep moving. Staying still is not an option.
If you try to fight up close, the Queen becomes even more dangerous. It can release an EMP pulse or perform a heavy ground slam, both capable of disrupting your movement and dealing serious damage.
Weaknesses and how to survive the fight?
The Queen doesn’t have a simple weak point like smaller ARC enemies, so survival depends on strategy. Always keep your distance and use solid cover. Avoid standing in open areas where mortar attacks can easily hit you.
Watch the timing of its attacks. Move as soon as you see incoming projectiles or laser targeting. Quick repositioning is key to staying alive.
Best strategy for beating the queen
Team coordination is highly recommended. While one player distracts, others can deal damage safely from different angles. Focus on consistent damage instead of rushing the fight.
Bring strong weapons, plenty of ammo, and healing supplies. This is not a fight you win by rushing; it’s about patience and control.
Loot and rewards
Defeating the Queen rewards you with high-tier materials like Advanced Powercells, ARC Alloy, Circuitry, and Mechanical Components. The rare Queen Reactor is the most valuable drop, used for advanced upgrades and late-game progression.
If you’re ready for a real challenge, the Queen fight offers some of the best rewards in the game, but only for those who come prepared.
Surveyor ARC Raiders
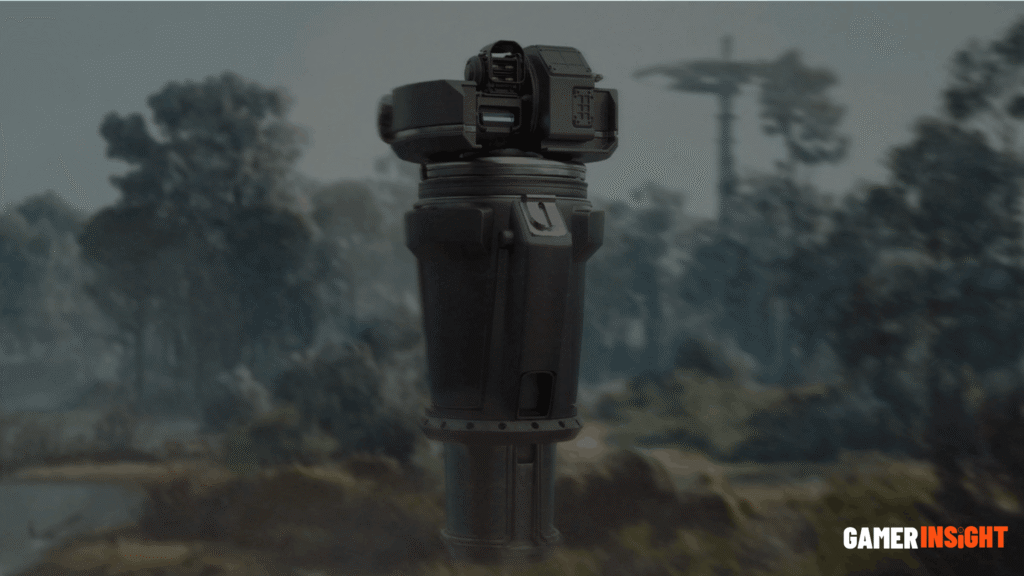
Turret ARC Raiders
The Turret is a fixed defense unit built to control space and stop Raiders from moving forward. You’ll usually find it placed near doors, tight hallways, or key paths where avoiding it is difficult. Even though it cannot move, its accuracy and constant fire make it very dangerous.
A Turret locks onto targets quickly and fires in controlled bursts. If you step into its line of sight without cover, you can lose a lot of health in seconds. The worst thing you can do is rush straight at it.
The smart way to deal with a Turret is by using cover and angles. Peek from a side where only a small part of the Turret is visible. Watch its firing pattern carefully; there is always a short pause between bursts. Use that moment to shoot, then move back into safety.
Stay patient, avoid open exposure, and you’ll take it down without taking heavy damage.
Sentinel ARC Raiders

The Sentinel is a patrol-based defense unit that guards high-value areas in ARC Raiders. It follows a fixed route and scans its surroundings in a predictable pattern. At first, it’s easy to avoid—but once it detects you, it becomes highly aggressive and won’t give up easily.
The best way to deal with a Sentinel is patience. Watch its movement and stay behind solid cover. Don’t rush the fight. Wait until it exposes its weak parts, such as fuel or power components.
Instead of spraying bullets, aim carefully and land precise shots. Smart timing and accuracy will take it down faster and keep you safe.
Bastion ARC Raiders
The Bastion is a walking tank. If you try to win a war of attrition against its front plating, you’re just going to waste all your ammo. It’s built to absorb damage and slowly walk you down until you have nowhere left to run. You have to get creative. Focus on the joints or the rear components when it’s turning. It’s slow, so use that to your advantage, kite it around cover and only strike when you have a clear shot at the unarmored mechanical bits.
Spotter ARC Raiders

Similar to the Surveyor, the Spotter is all about detection. It’s a reconnaissance unit designed to mark your position for the heavy hitters. It won’t win a 1v1 against you, but it’s the reason you suddenly find a Bastion or a Sentinel knocking on your door.
Stay out of its detection ring. If you do get marked, eliminate the Spotter immediately and reposition. Accurate shots to its exposed sensors will shut it down before it can finish its broadcast.
Matriarch ARC Raiders
Matriarch is one of the most powerful ARC enemies, often treated like a high-tier boss unit rather than a regular encounter. It’s built to dominate open fights with extreme durability, heavy area pressure, and relentless attacks that force players to constantly reposition. If you get caught in a bad angle, it can overwhelm you very quickly.
The safest way to approach a Matriarch is patience and coordination. You want to stay mobile, avoid staying in open sightlines, and only take shots when you clearly see exposed weak areas or unarmored sections. Going in solo is usually risky, because this type of enemy is designed around sustained pressure and team coordination.
In most encounters, survival matters more than aggressive damage. If the situation turns too chaotic, disengaging and resetting your position is often the smartest play.
Shredder ARC Raiders
Shredder is a fast and aggressive ARC enemy designed to overwhelm players through close-range pressure and constant movement. It doesn’t rely on heavy armor, but instead on speed and repeated attacks that can catch you off guard in tight spaces. If you lose track of it, things can spiral quickly.
The best way to handle a Shredder is to keep a distance and control its movement. It’s usually most vulnerable when it’s exposed during turns or brief pauses between attacks, so aim for those moments instead of spraying blindly.
Staying aware of sound cues and avoiding cramped areas makes this fight much easier to manage.
Arc Probe ARC Raiders
Arc Probe is a scouting style ARC unit that moves through the environment to detect player activity and gather information for nearby machines. It’s not usually the strongest enemy in direct combat, but it can make fights harder by revealing your position at the worst possible time.
The safest way to deal with an Arc Probe is to destroy it as soon as you spot it. It typically has low durability, so accurate shots to exposed parts will take it down quickly. Staying aware of its scanning behavior and removing it early helps you avoid unwanted enemy attention during raids.
Vaporizer ARC Raiders
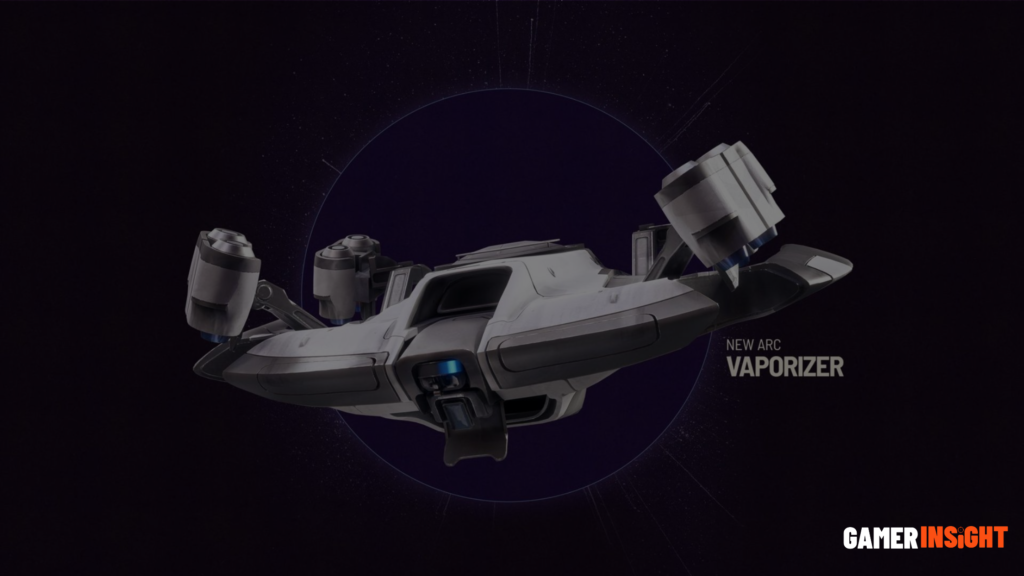
Vaporizer is an ARC enemy that typically uses area pressure attacks, forcing players out of cover with lingering damage zones or burst-style effects. Instead of rushing in, it tries to control space and limit where you can safely move during a fight.
The best way to deal with a Vaporizer is to avoid standing in one position for too long. Watch its attack pattern, then move between cover whenever it prepares to fire. When you get a clear opening, focus on any exposed or less protected components and take short, controlled shots instead of prolonged exposure.
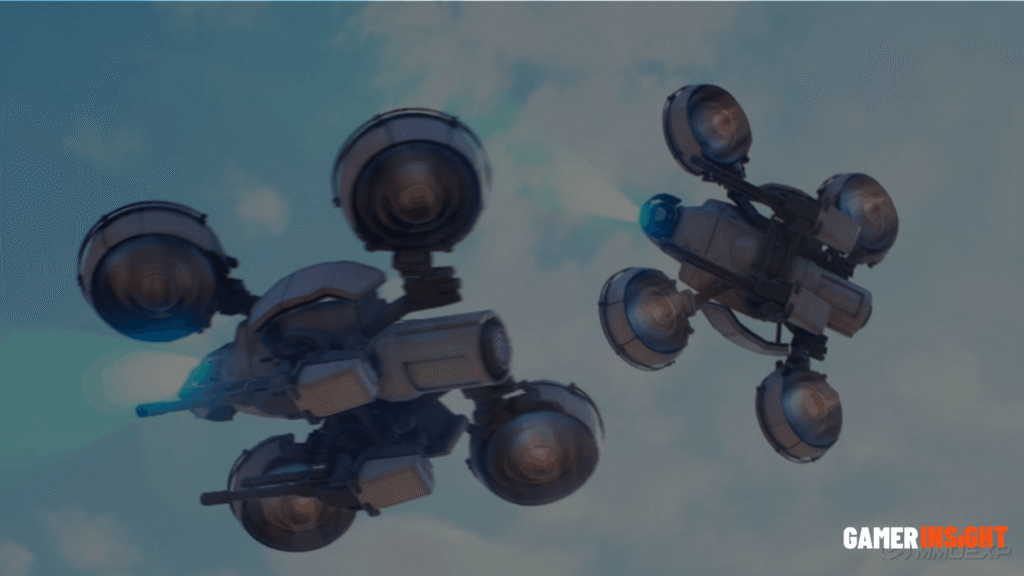
Hornet ARC Raiders

The Hornet is a compact flying ARC unit that often appears alongside Wasps in patrol groups. While it may look less threatening than larger machines, it can quickly turn the fight in the enemy’s favor by stunning Raiders and breaking their rhythm during combat.
How does the hornet attack in combat?
When engaged, the Hornet locks onto a target using a red laser before firing a single stun shot. This projectile is not very fast, but it is highly disruptive. On impact, it briefly stuns the player and drains shield energy, leaving them exposed to follow-up attacks from nearby ARC units.
Weak spots and damage strategy
The Hornet stays in the air using four thrusters. Its front thrusters are protected by armor, so direct damage requires Medium or Heavy Ammo for better penetration. Once enough thrusters are destroyed, the drone becomes unstable and crashes, taking additional damage from impact.
Simple survival approach
Avoid standing still, as this increases the chance of getting stunned. Keep moving and use cover wisely. If multiple enemies are present, a distraction tool like a Lure Grenade can help you reposition safely.
Valuable drops and uses
Defeating a Hornet rewards materials such as Medium Ammo, ARC Alloy, and Synthetic Resin. The most important drop is the Hornet Driver, which is used to upgrade your Gear Bench and can also be used tactically to stun enemies in certain situations.
Hornet Baron ARC Raiders
The Hornet Baron is an elite ARC unit in ARC Raiders, sitting between a standard enemy and a full boss fight. It is not a true boss, but it behaves like one in combat due to its higher durability and more aggressive attack style. Players often treat it as a “boss-lite” encounter because it demands patience and smart positioning.
What makes Hornet Baron different?
Compared to normal Hornets, the Baron comes with stronger armor, better targeting accuracy, and faster movement between positions. It doesn’t stay in one place for long, making it harder to track and hit. This mobility allows it to pressure players continuously during fights.
Best way to fight hornet baron
The key to winning this fight is positioning. Avoid open ground and always stay near cover. Instead of chasing it directly, wait for moments when its core or weak angle becomes exposed. Controlled bursts of damage work far better than rushing attacks.
Why is this fight worth it?
Even though the Hornet Baron is dangerous, it offers strong rewards. If defeated cleanly, it becomes one of the best early-game sources of valuable loot. The risk is high, but so is the payoff, making it a smart target for prepared Raiders looking to grow faster.
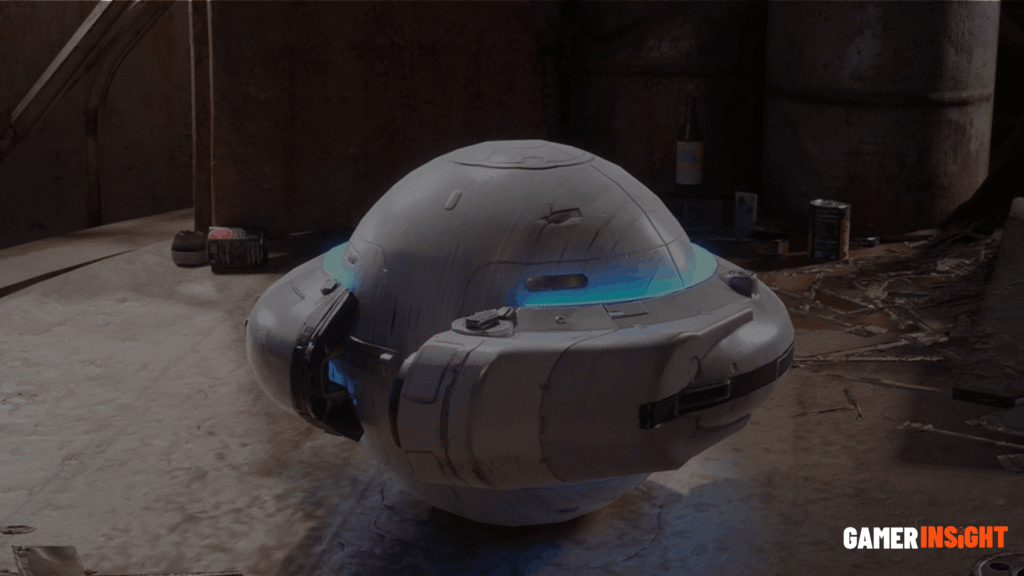
Husk ARC Raiders
The Husk is one of the most durable ARC units in ARC Raiders, built specifically to absorb massive amounts of damage while pushing players out of position. It may not be fast or flashy, but it is extremely dangerous because it can survive sustained fire and force long, costly fights.
Why does the husk feel so tough?
The front of the Husk is heavily armored, making it almost immune to standard gunfire. Many players waste full magazines trying to break it from the front, only to see very little damage. This design forces you to change your approach instead of relying on brute force.
Smart ways to deal with damage
The best strategy is to avoid shooting the front entirely. Instead, move around it and aim for weaker areas like the side or underbelly. Armor-piercing rounds are far more effective here and help shorten the fight significantly. Positioning is everything. Stay mobile and look for angles where the armor is less effective.
Common mistakes to avoid
The biggest mistake is standing still and spraying the front armor. This not only wastes ammo but also puts you at risk of counterattacks. Always rotate around the Husk and reset your position if needed.
With the right angle and ammo choice, even this tanky unit becomes much easier to handle.
Leaper ARC Raiders
The Leaper is one of the most dangerous close-range ARC units in ARC Raiders. It is designed to rush players instantly and overwhelm them before they can react properly. If you panic or stand still, it can end the fight in seconds.
Why are leapers so dangerous?
Leapers rely on speed and surprise. They jump or dash toward you from short distances, closing the gap almost immediately. Their main strength is pressure; once they are on top of you, escaping becomes much harder.
How to dodge leaper attacks?
The key to survival is movement. Do not run straight backward, as this makes you an easy target. Instead, strafe sideways to avoid their leap path. Proper timing is important; move just before they commit to the attack for the best chance to avoid damage.
Best weapons for close combat
Leapers are weak to burst damage. Shotguns and fast-firing weapons work best because they deal serious damage in a short window. You won’t have time for slow reloads or long aim adjustments, so keep your loadout simple and quick.
Team communication tip
If you are playing with teammates, clear callouts help a lot. A simple phrase like “Leaper close, left side” is enough to keep everyone aware and ready to react.
With good timing and smart movement, even this fast enemy becomes manageable.
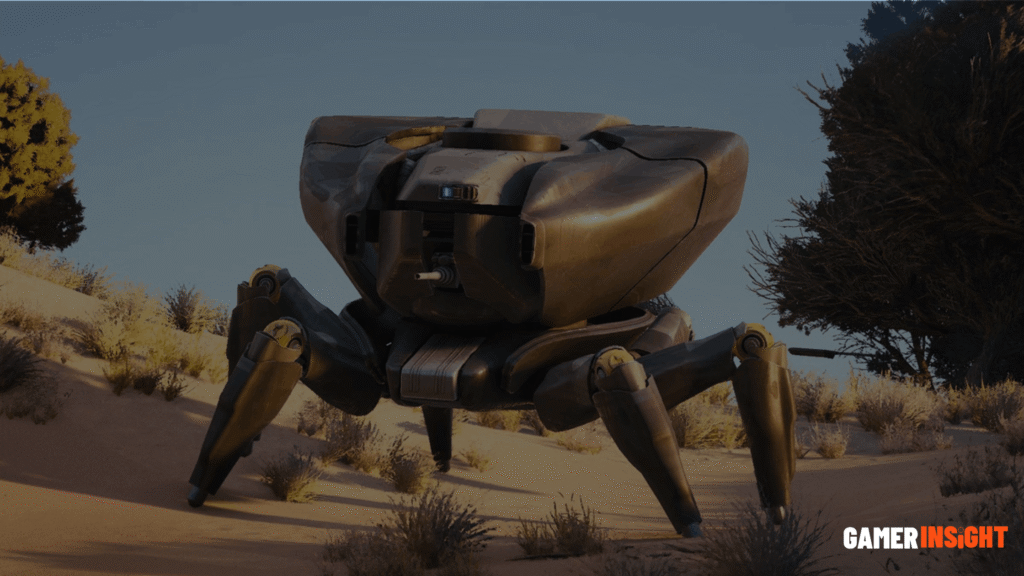
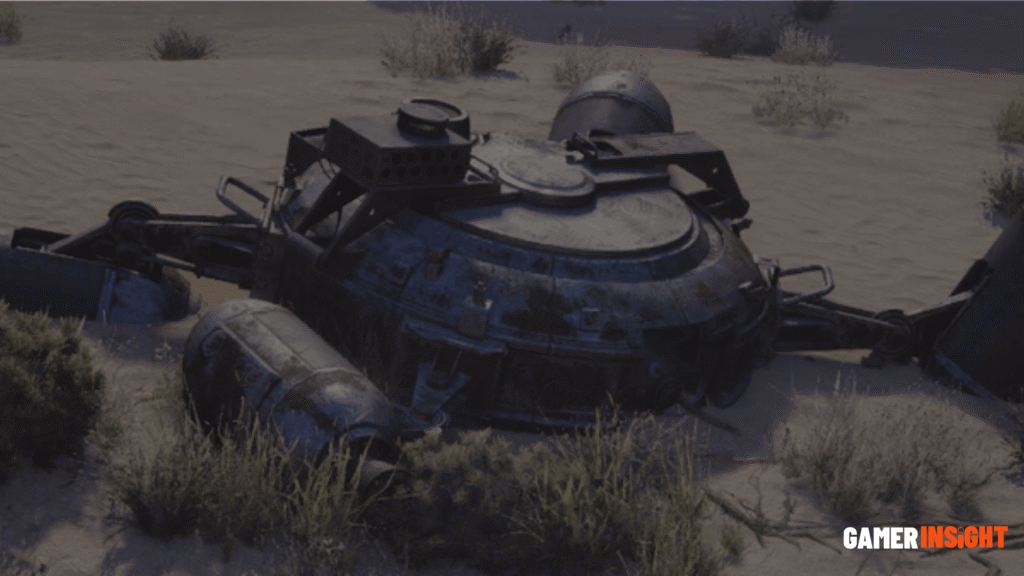
Harvester ARC Raiders
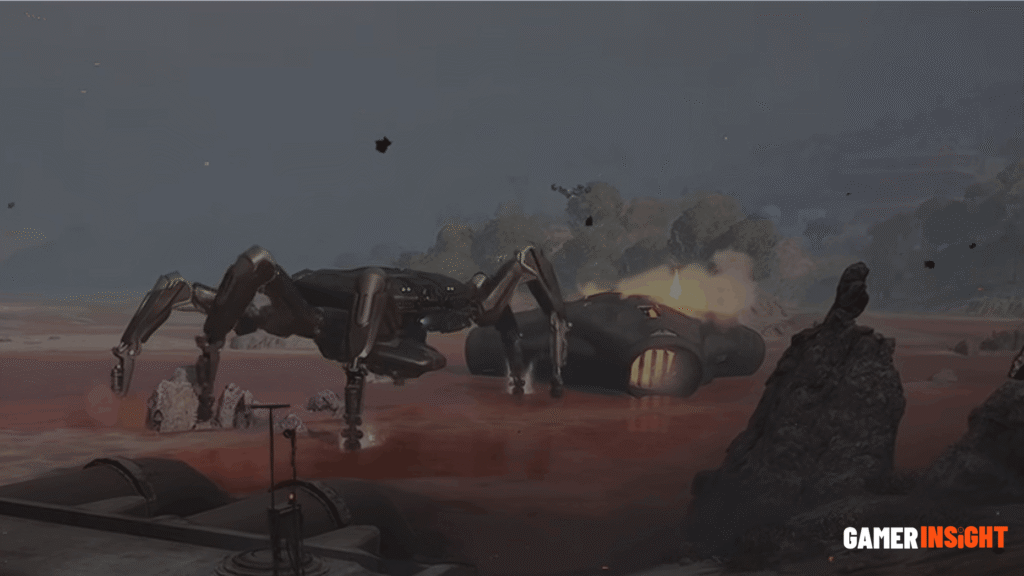
Harvester units in ARC Raiders are resource-gathering machines that patrol important zones. They are not aggressive by default, but their presence often attracts attention from other enemies and players, making the area more dangerous.
Fighting them is usually not recommended unless you are well-prepared or specifically need loot. These units can be tough to handle, and engaging them often increases your risk of being exposed.
The best opportunity to attack is when they are stationary or distracted during resource collection. Even then, you should stay alert for nearby threats.
While they offer medium-tier rewards, the real danger comes from the attention they draw. Always weigh the loot against the risk before engaging.
Bombardier ARC Raiders

Bombardiers are among the most dangerous long-range ARC enemies in this game. They attack from a distance by launching powerful explosives that can quickly clear open areas and punish careless movement.
Their main threat is area bombardment. They don’t need to see you clearly to deal damage, which makes open terrain extremely risky during combat. To survive, keep moving in unpredictable patterns and avoid staying in one spot for too long. Never fight in open ground where you have no escape.
Always use solid cover, like walls or reinforced structures. Weak or thin cover can be destroyed by explosions, leaving you exposed. For offense, long-range rifles work best. Precision shots are important since you won’t get many safe chances to attack.
Osprey ARC Raiders
Aerial enemies in ARC Raiders are fast, high-mobility threats that attack from above. They constantly track players and apply pressure with steady fire, making open fights risky and unpredictable.
The best way to detect them is through sound. Audio cues are more reliable than visuals, as these units move quickly and often stay out of clear sight.
To counter them, aim for engine or thruster weak points while they are in flight. This reduces their stability and makes them easier to bring down. In squad play, teamwork is key. One player should draw attention while the other focuses on dealing precise damage.
Bees ARC Raiders
Bee units in ARC Raiders are swarm-style enemies that rely on numbers instead of strength. Individually weak, they become deadly when they attack in large groups and surround you quickly.
To handle multiple targets, area-of-effect tools are the most effective choice. Weapons like Blaze grenades or Snap Blast explosives can clear clusters fast and reduce pressure instantly. Explosives remain the best crowd control option because they deal damage across a wide area, stopping the swarm before it closes in.
Jupiter ARC Raiders
Jupiter is one of the most mysterious and powerful ARC units in this game. While not fully confirmed, it is widely believed to be a large-scale boss or a special zone event machine that appears during endgame encounters.
Its exact role is still unclear, but all signs point to it being a high-tier threat designed for experienced players only. Early reports suggest extremely high durability and devastating attack potential.
If Jupiter becomes active in your area, it is best to avoid engagement unless you are fully geared. Recommended loadouts include heavy-hitting weapons like Anvil, Hullcracker, or Equalizer builds.
Overall difficulty is expected to be extreme, making it a true endgame challenge for coordinated teams.
ARC Raiders Enemies Difficulty Ranking
Let’s keep it simple.
Easiest enemies for beginners
Bees, Hornets.
Most dangerous for solo players
Leapers and Bombardiers.
Hardest for squads
Hornet Baron and Jupiter.
Best enemies to farm
Hornets and Harvesters.
Best Weapons and Loadouts Against ARC Raiders Enemies
Your loadout matters more than your aim.
Best loadouts for flying enemies
Medium ammo rifles + tracking optics.
Best for armored enemies
Armor-piercing + Deadline mines.
Best mobility gear
Anything that helps reposition quickly.
Recommended squad compositions
Balanced teams win. Damage, support, mobility.
How to Fight Multiple Enemy Types at Once
Chaos is where players break.
Prioritization order
Bombardier → Leaper → Hornet → Others
Positioning when surrounded
Stay near cover. Always.
Ammo conservation tips
Shoot weak spots only.
When to retreat
If you lose position, disengage immediately.
Solo vs Squad Enemy Strategies
Completely different mindset.
Best tactics for solo players
Stealth, positioning, patience.
Best tactics for duos and trios
Aggression with coordination.
How enemy behavior changes
More targets = more chaos.
Communication tips
Clear, short callouts win fights.
Common Mistakes Players Make
You’ve probably done at least one.
Ignoring sound cues
Big mistake. Sound tells everything.
Fighting in open terrain
You’re asking to get hit.
Overcommitting for loot
Greed gets you killed.
Using the wrong weapons
Weapon mismatch is the #1 reason players lose fights.
Future ARC Raiders Enemies We May See
The game is evolving.
Possible new machine classes
Expect stealth units and heavier bosses.
Boss encounters
Likely raid-style events.
Seasonal variants
Different mechanics, same base enemies.
Meta changes
Loadouts will shift constantly.
Frequently Asked Questions
What is the strongest enemy in ARC Raiders?
Right now, Jupiter is expected to be the strongest, though this is not yet fully confirmed.
How do you beat Hornett in ARC Raiders?
Target rear engines and use medium ammo weapons.
What is husk in ARC Raiders?
A heavily armored enemy with weak underbelly sections.
Are ARC Raiders enemies PvE only?
No. It’s PvPvE. Players are always part of the threat.
Which enemy gives the best loot?
Hornet Baron and Harvesters are solid choices.
What enemy is hardest for solo players?
Leapers and Bombardiers.
Final Takeaway
Winning in ARC Raiders is not just about fast shooting or strong weapons. It is about understanding enemy behavior, spotting weak points, and choosing the right moment to strike.
Start by practicing against easier enemies like Hornets. Learn how they move and attack before taking on stronger ARC units. This builds confidence and control.
Patience is very important. Stay calm, avoid unnecessary fights, and don’t rush into danger. When combat gets intense, focus on positioning. Good cover and smart angles are often more important than raw firepower.